
Open Meta Developers and create an app
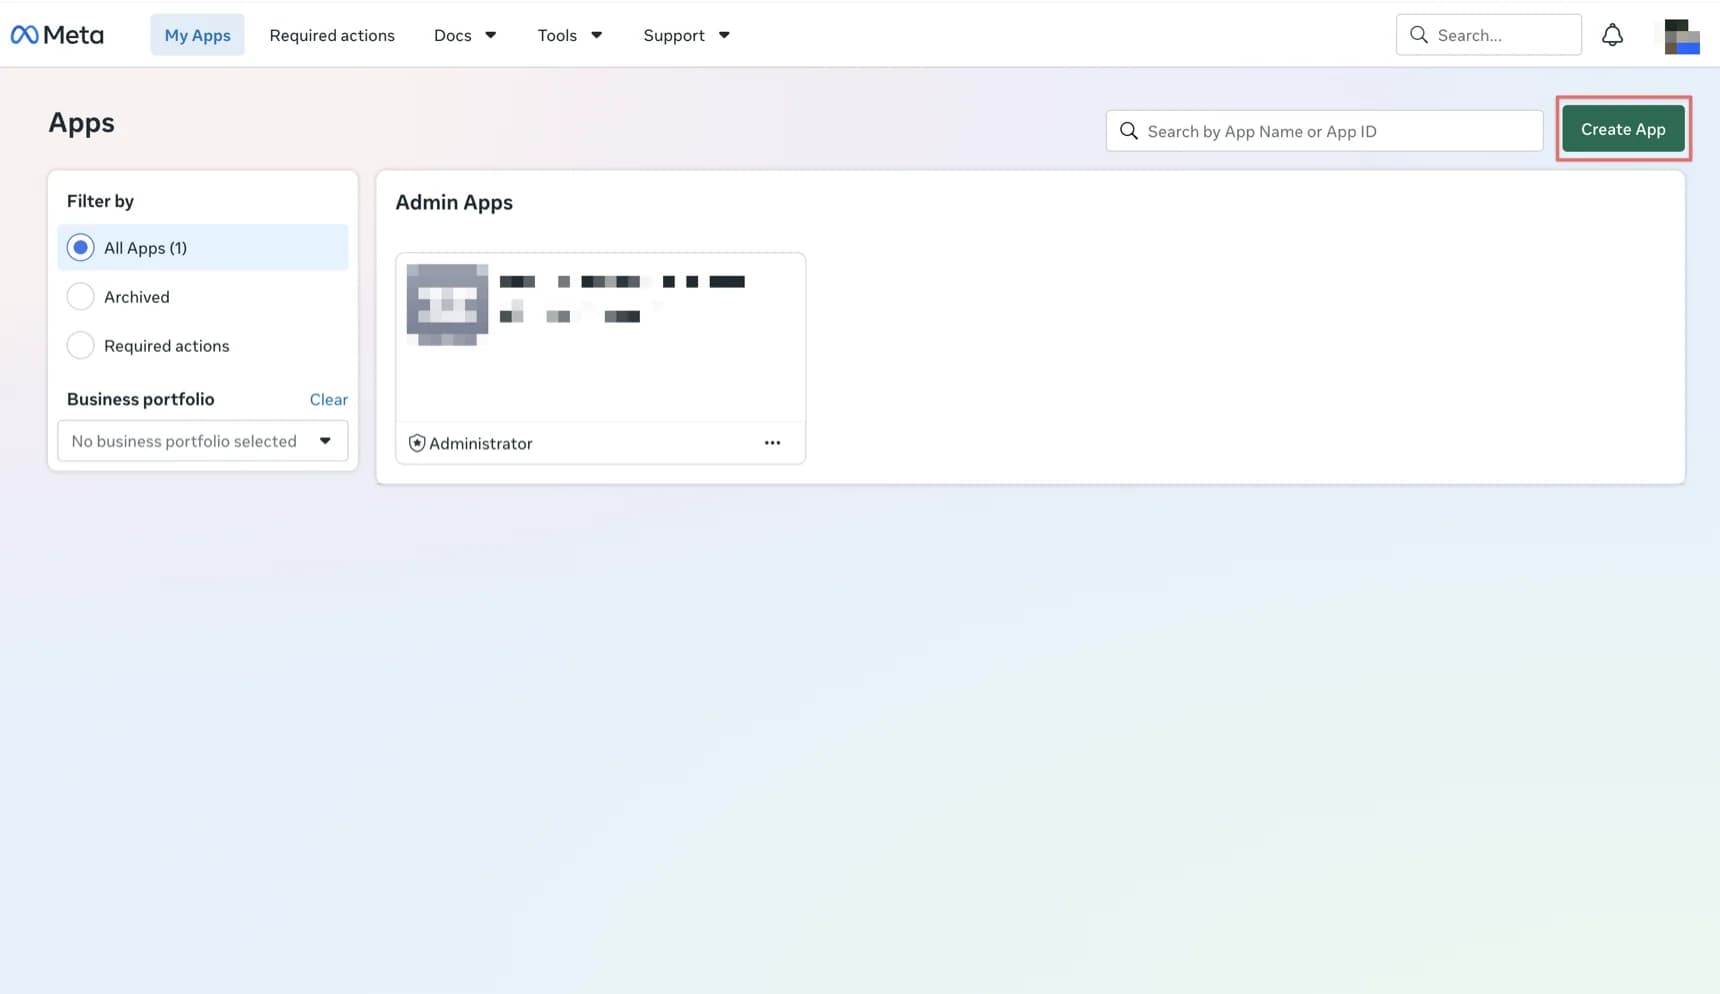
Open developers.facebook.com/apps and click Create App in the top-right corner of the Apps page.
GUIDE / THREADS ACCESS TOKEN
Your dashboard is deployed. Now it needs a key: follow one screenshot per step through Meta for Developers and leave with a long-lived Threads access token.
About 10 minutes · Free · No code involved
This flow covers personal and testing use. Supporting non-test users usually requires App Review and publishing the app.
01THE ROUTE
Every step is one screenshot and one click. Three happen inside Threads; everything else lives in Meta for Developers.
Six screens of the app-creation wizard — name it, pick the Threads API use case, and skip everything optional.
STEPS 7–1202Invite a Threads TesterOpen the use case settings and hand the tester role to the Threads account that owns the data.
STEPS 13–1403Accept in ThreadsSwitch to the invited Threads account for two clicks — the invitation is waiting under website permissions.
STEPS 15–1804Generate the tokenBack in Meta Developers: generate, authorize, copy. The long-lived token is yours.
01 / STEPS 1–6
Six screens of the app-creation wizard — name it, pick the Threads API use case, and skip everything optional.
Open developers.facebook.com/apps and click Create App in the top-right corner of the Apps page.
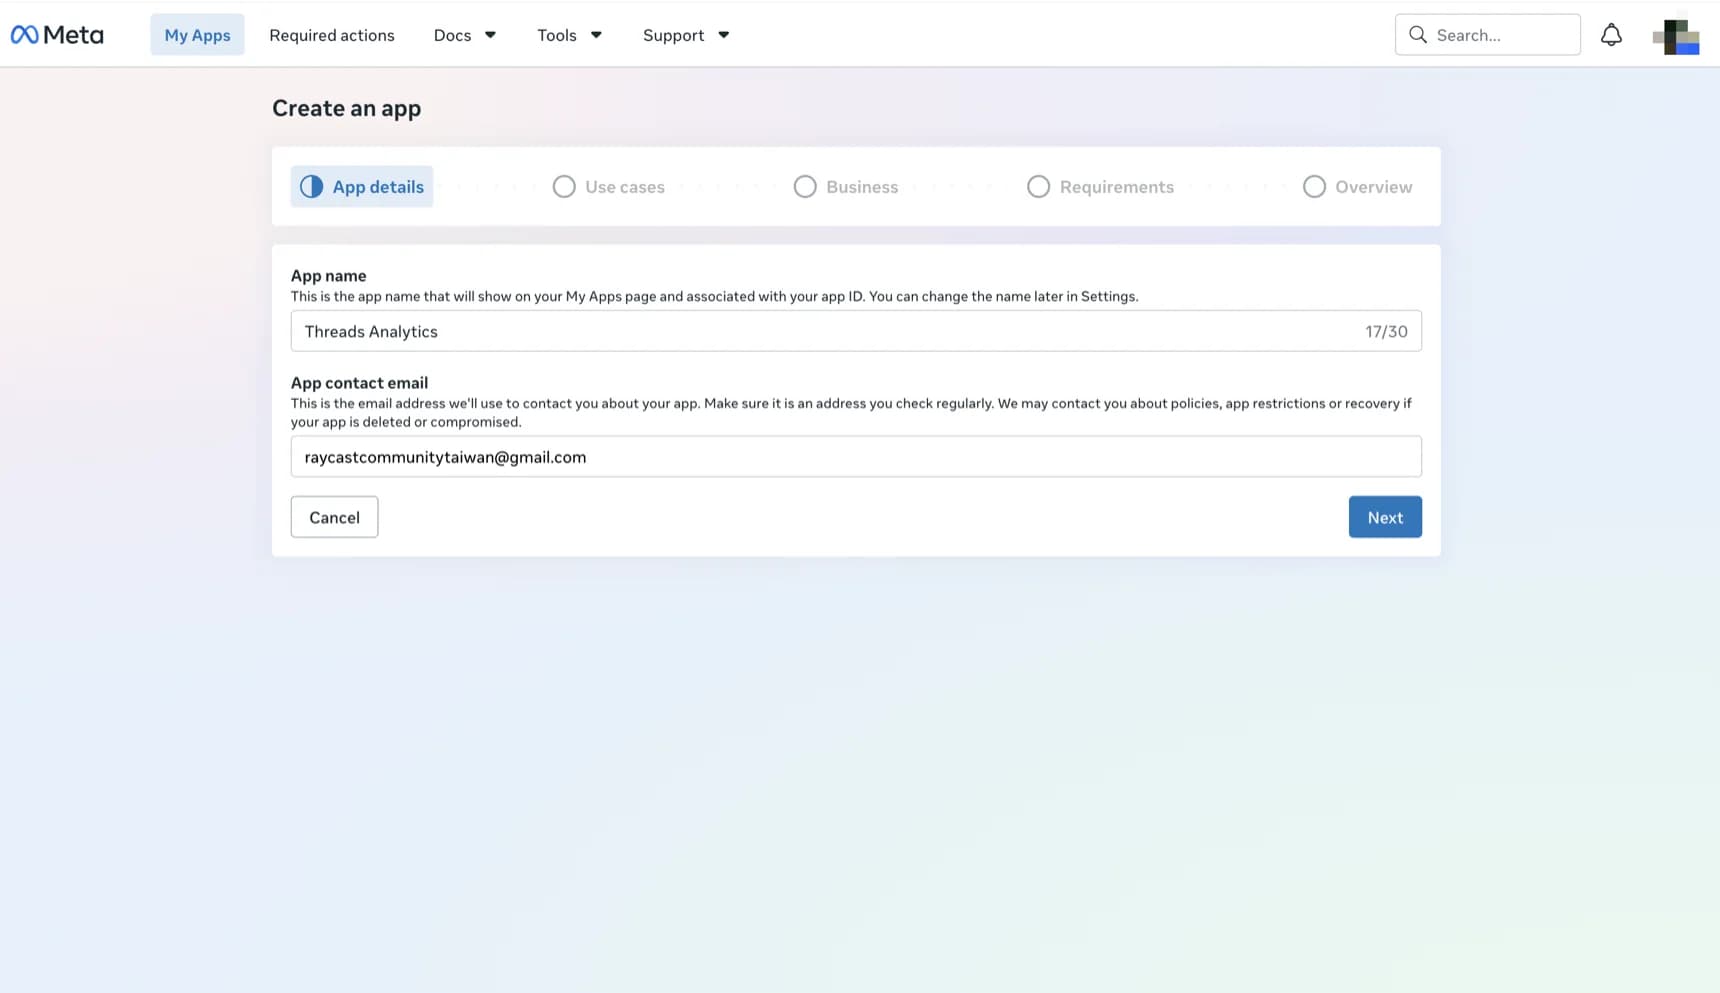
On the Create an app page, fill in the two fields, then click Next.
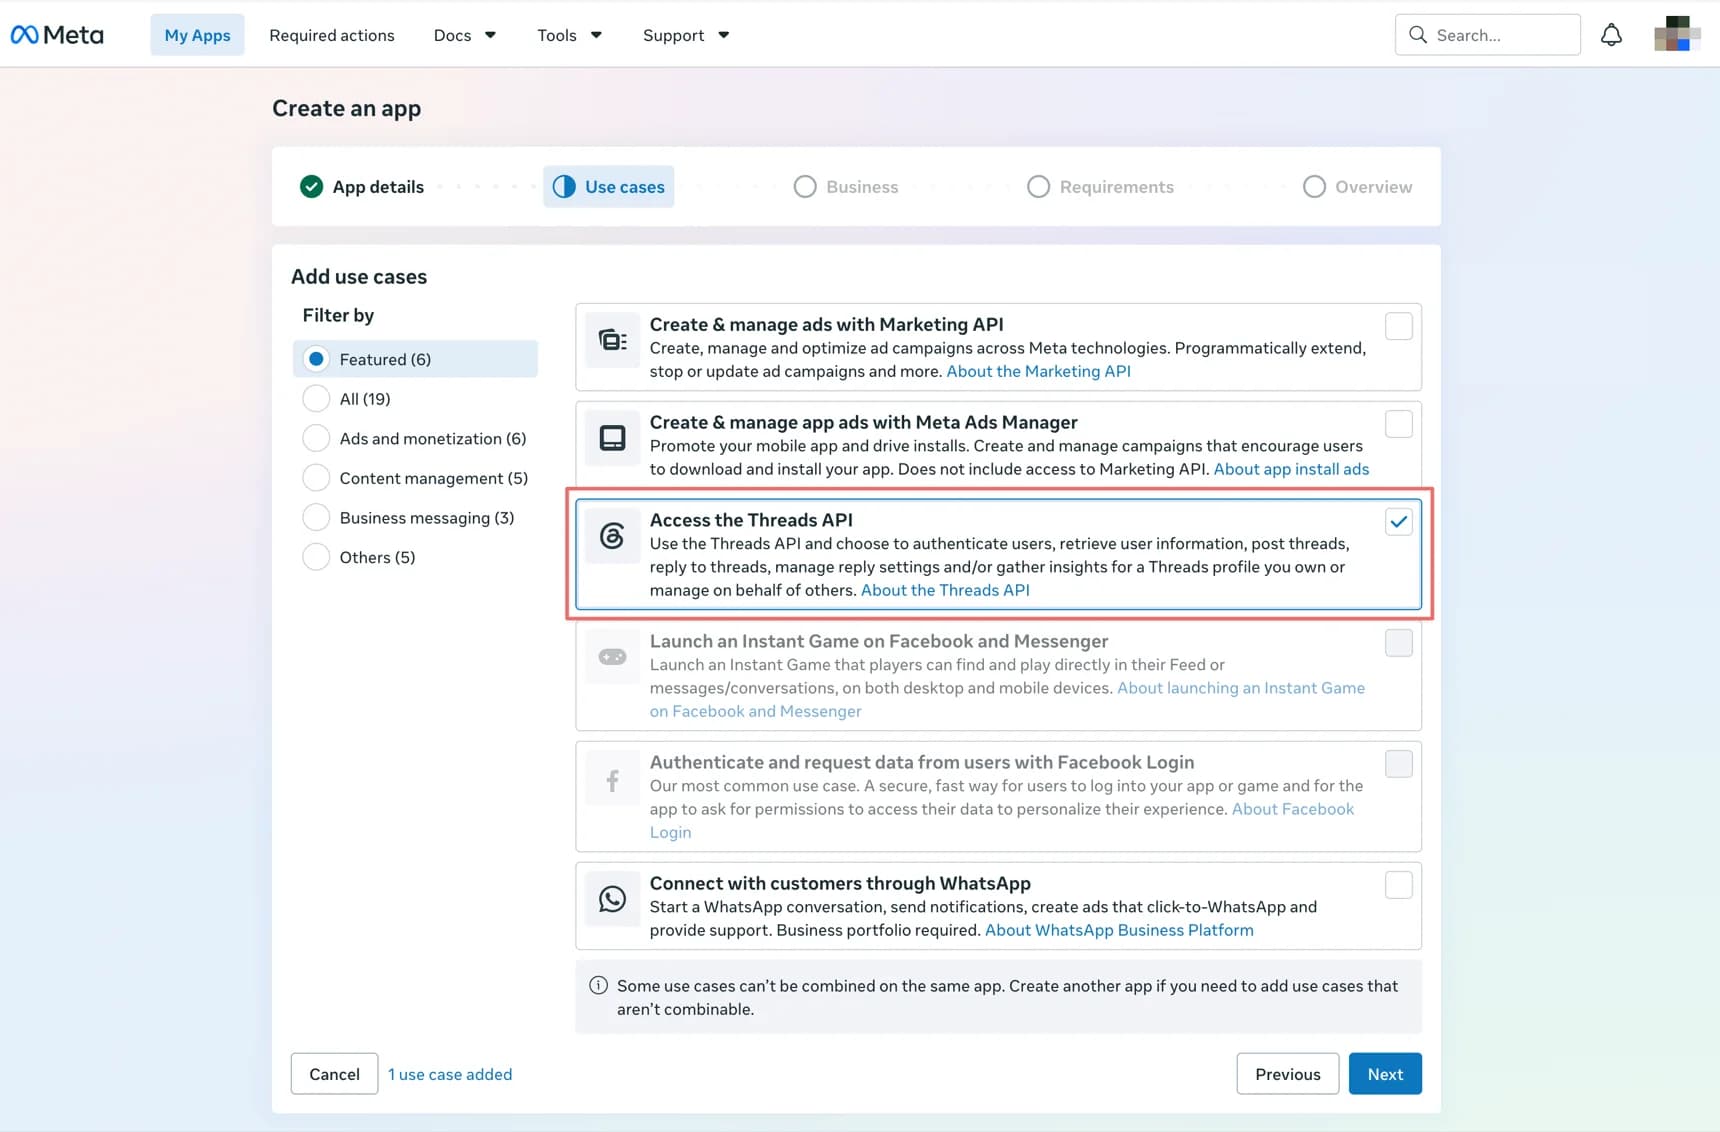
On the Add use cases page, find Access the Threads API, select the checkbox on the right, and click Next.
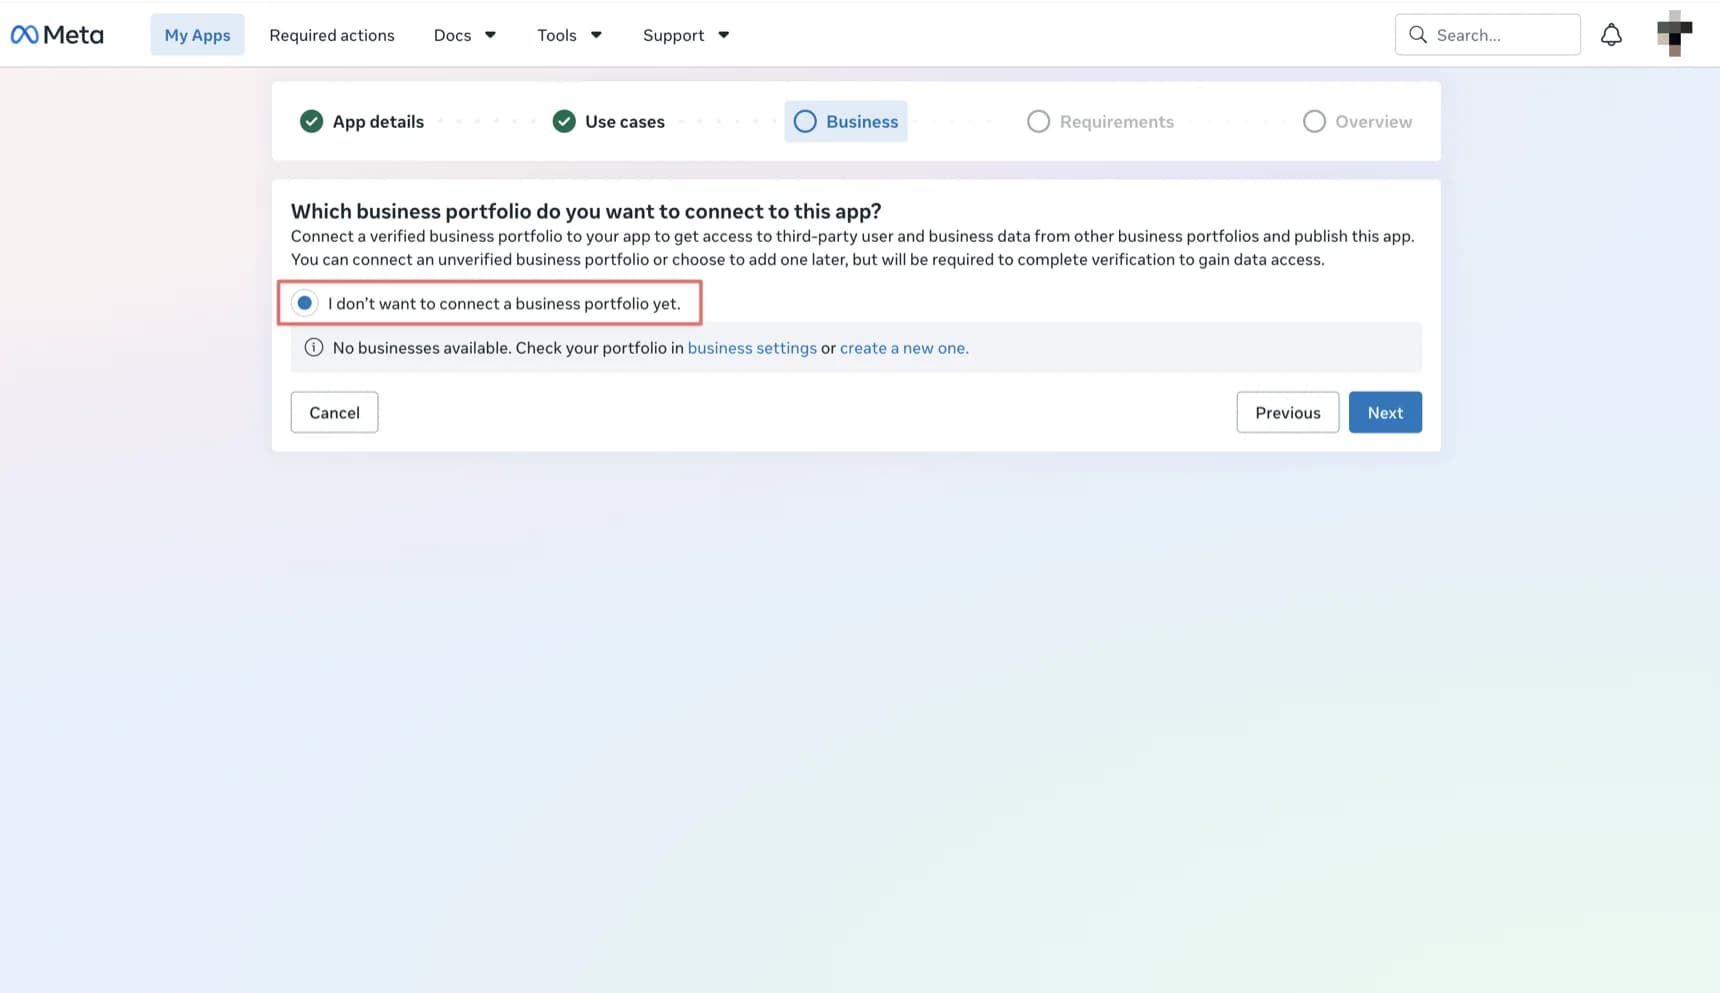
On the business portfolio step, select I don't want to connect a business portfolio yet., then click Next.
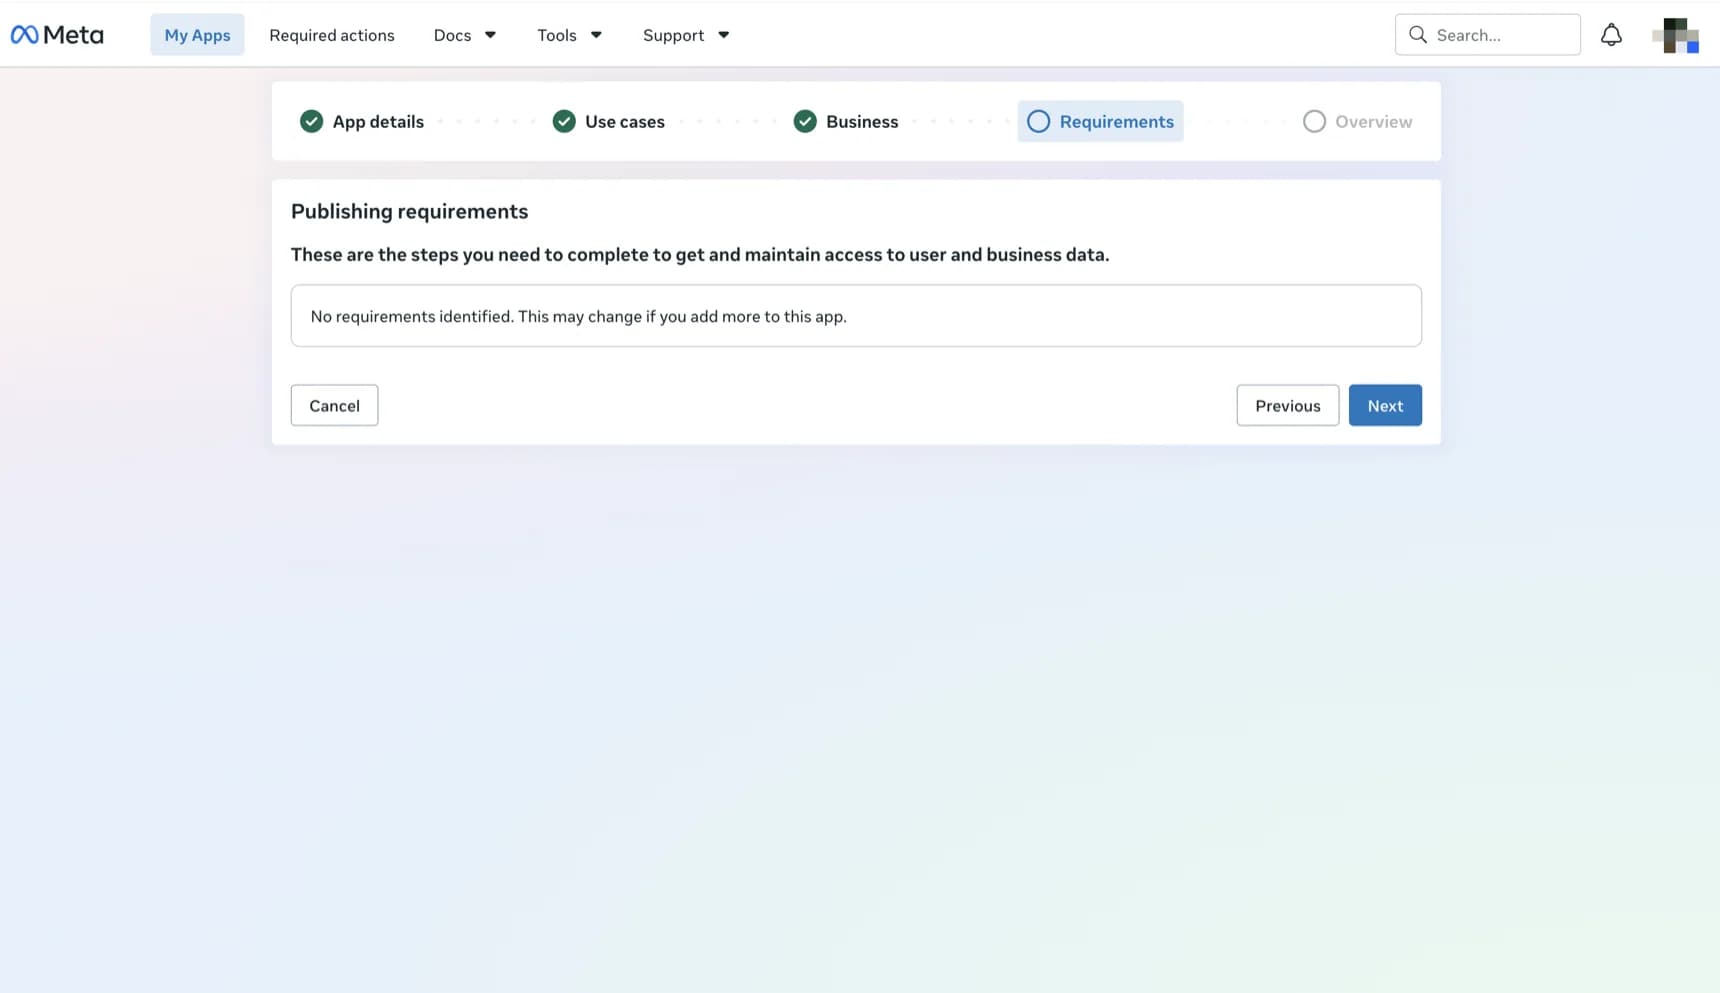
When the page shows No requirements identified, there is nothing extra to prepare for this setup. Click Next.
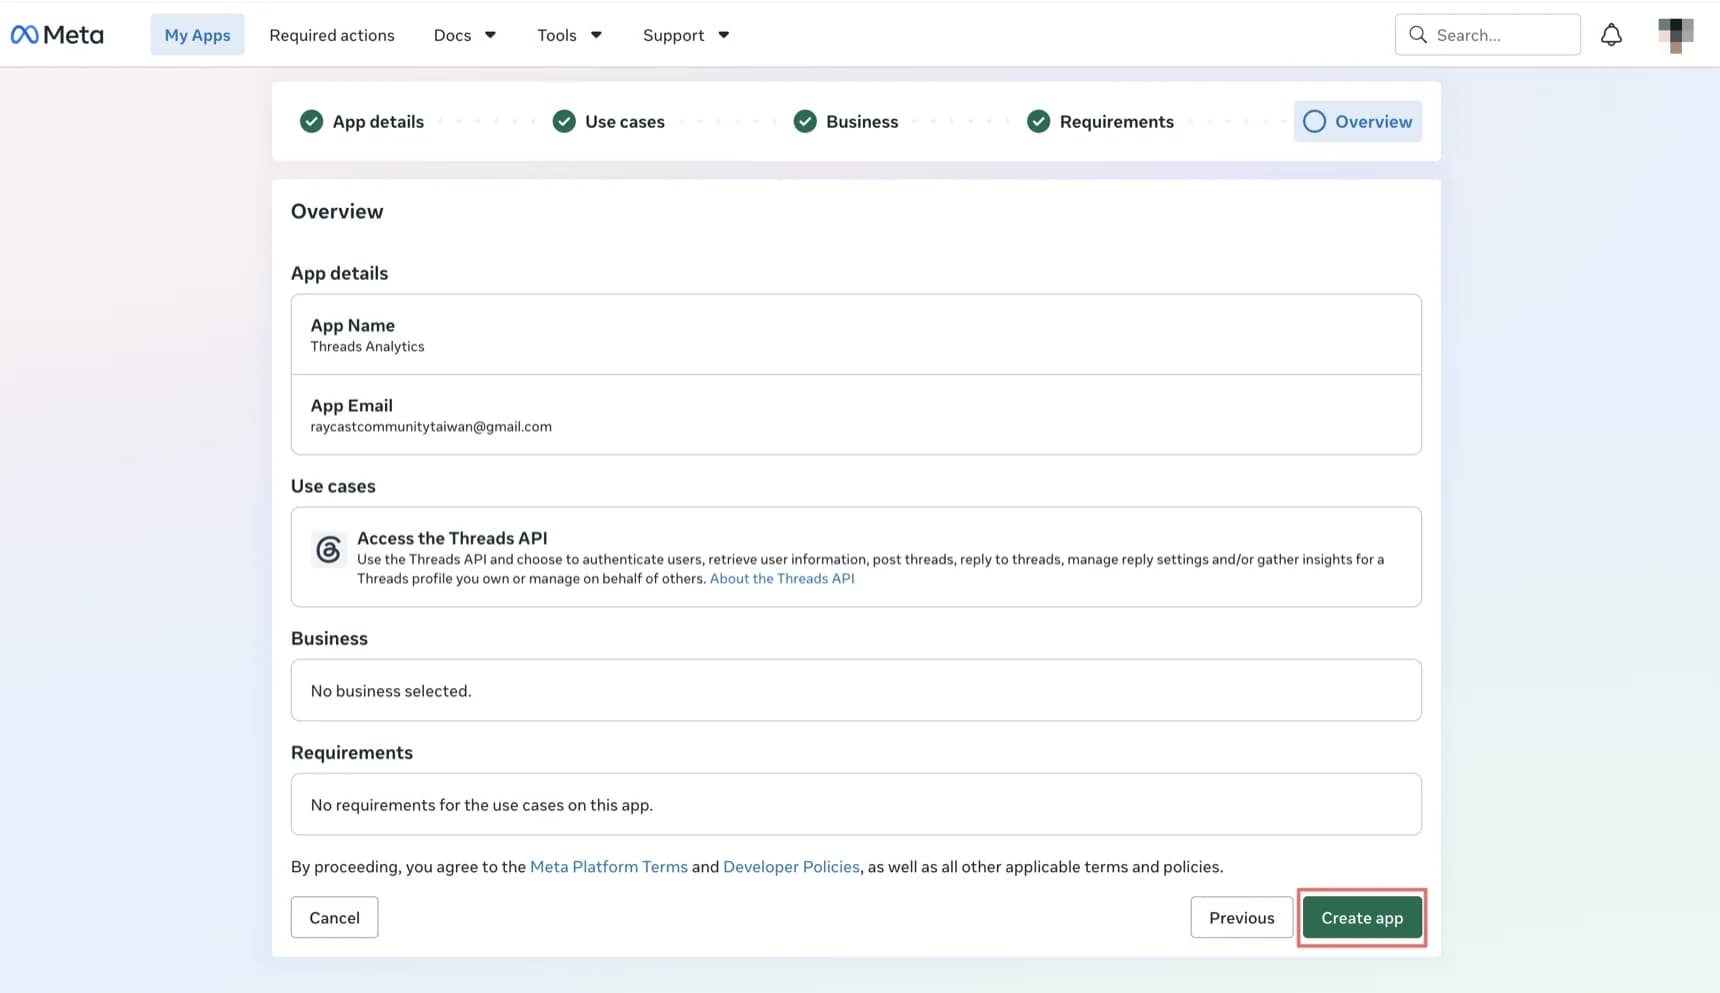
On the Overview page, confirm the app name, email, use case, business, and requirements, then click Create app in the bottom-right corner.
02 / STEPS 7–12
Open the use case settings and hand the tester role to the Threads account that owns the data.
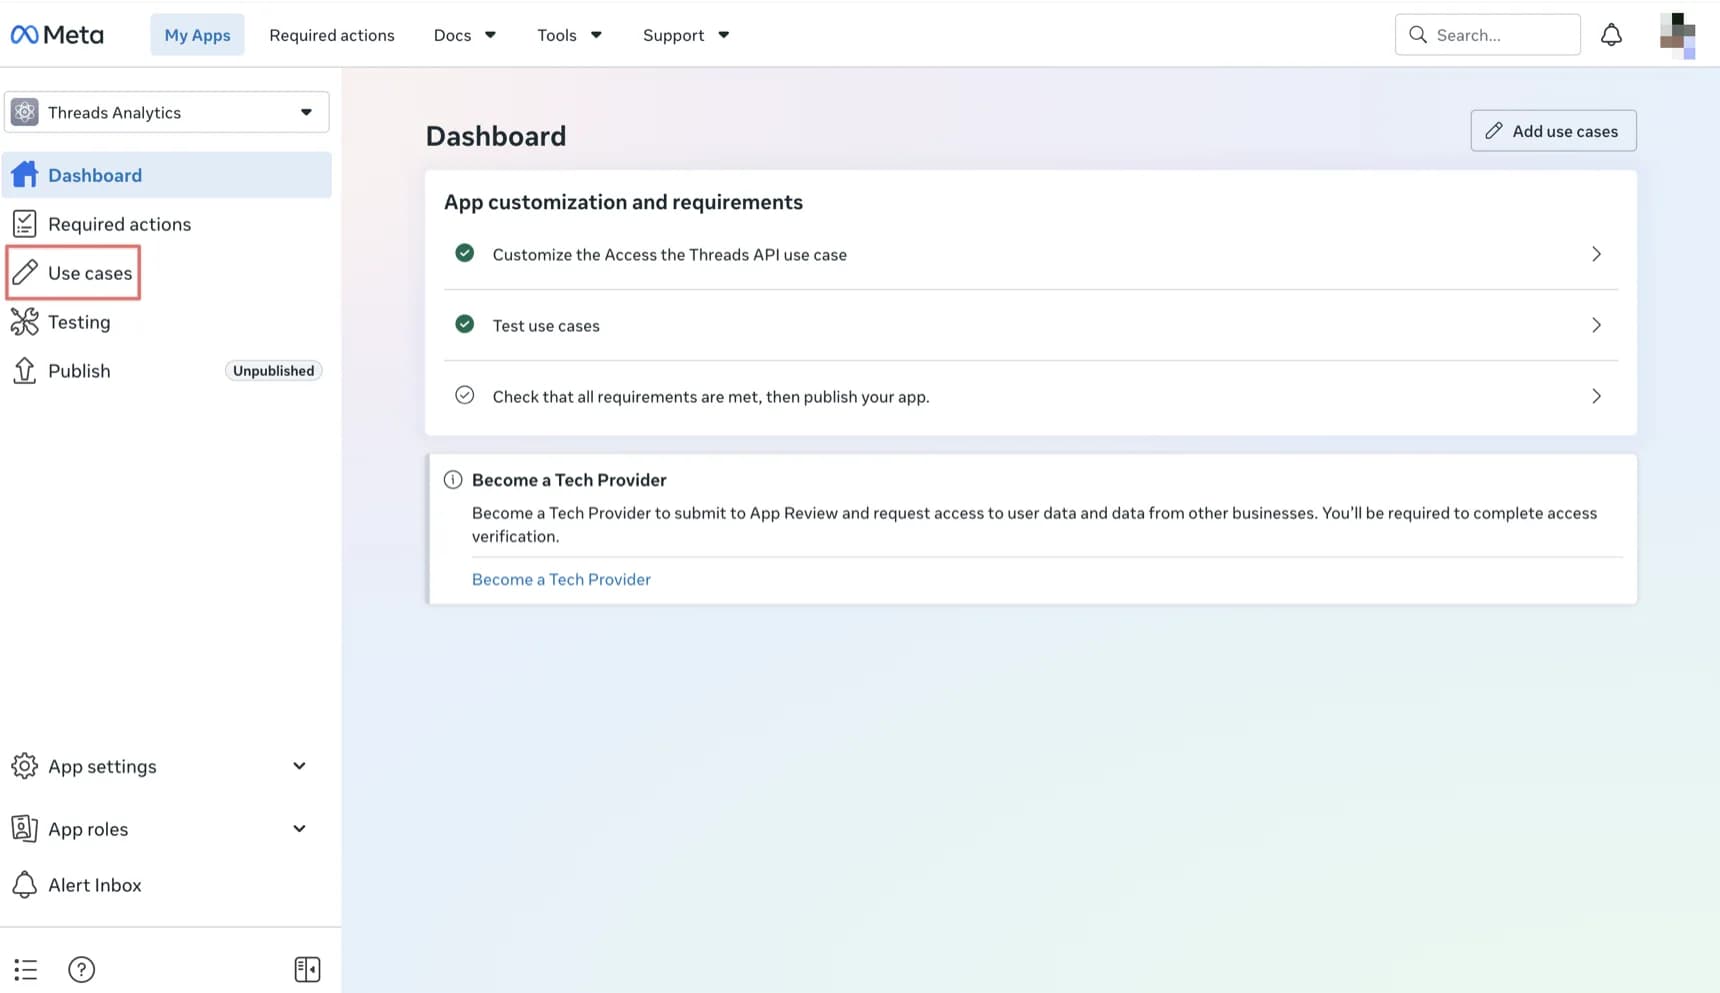
The Dashboard appears once the app is created. Click Use cases in the left sidebar.
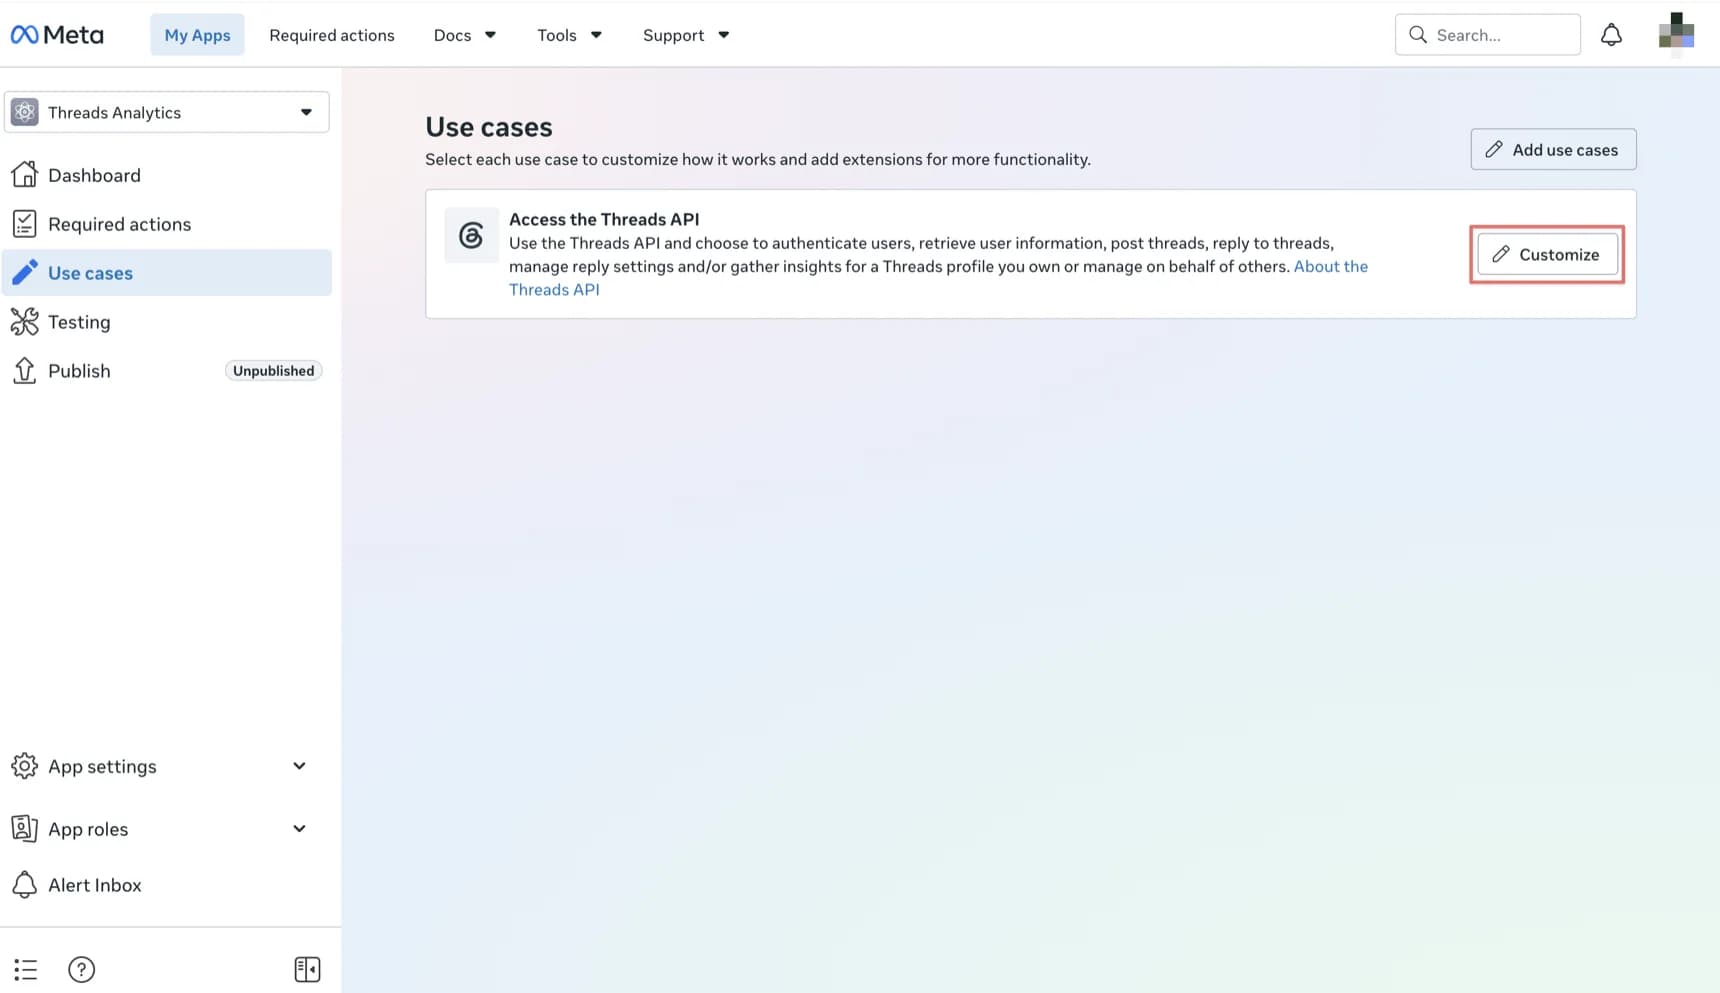
On the Use cases page, find Access the Threads API and click Customize.
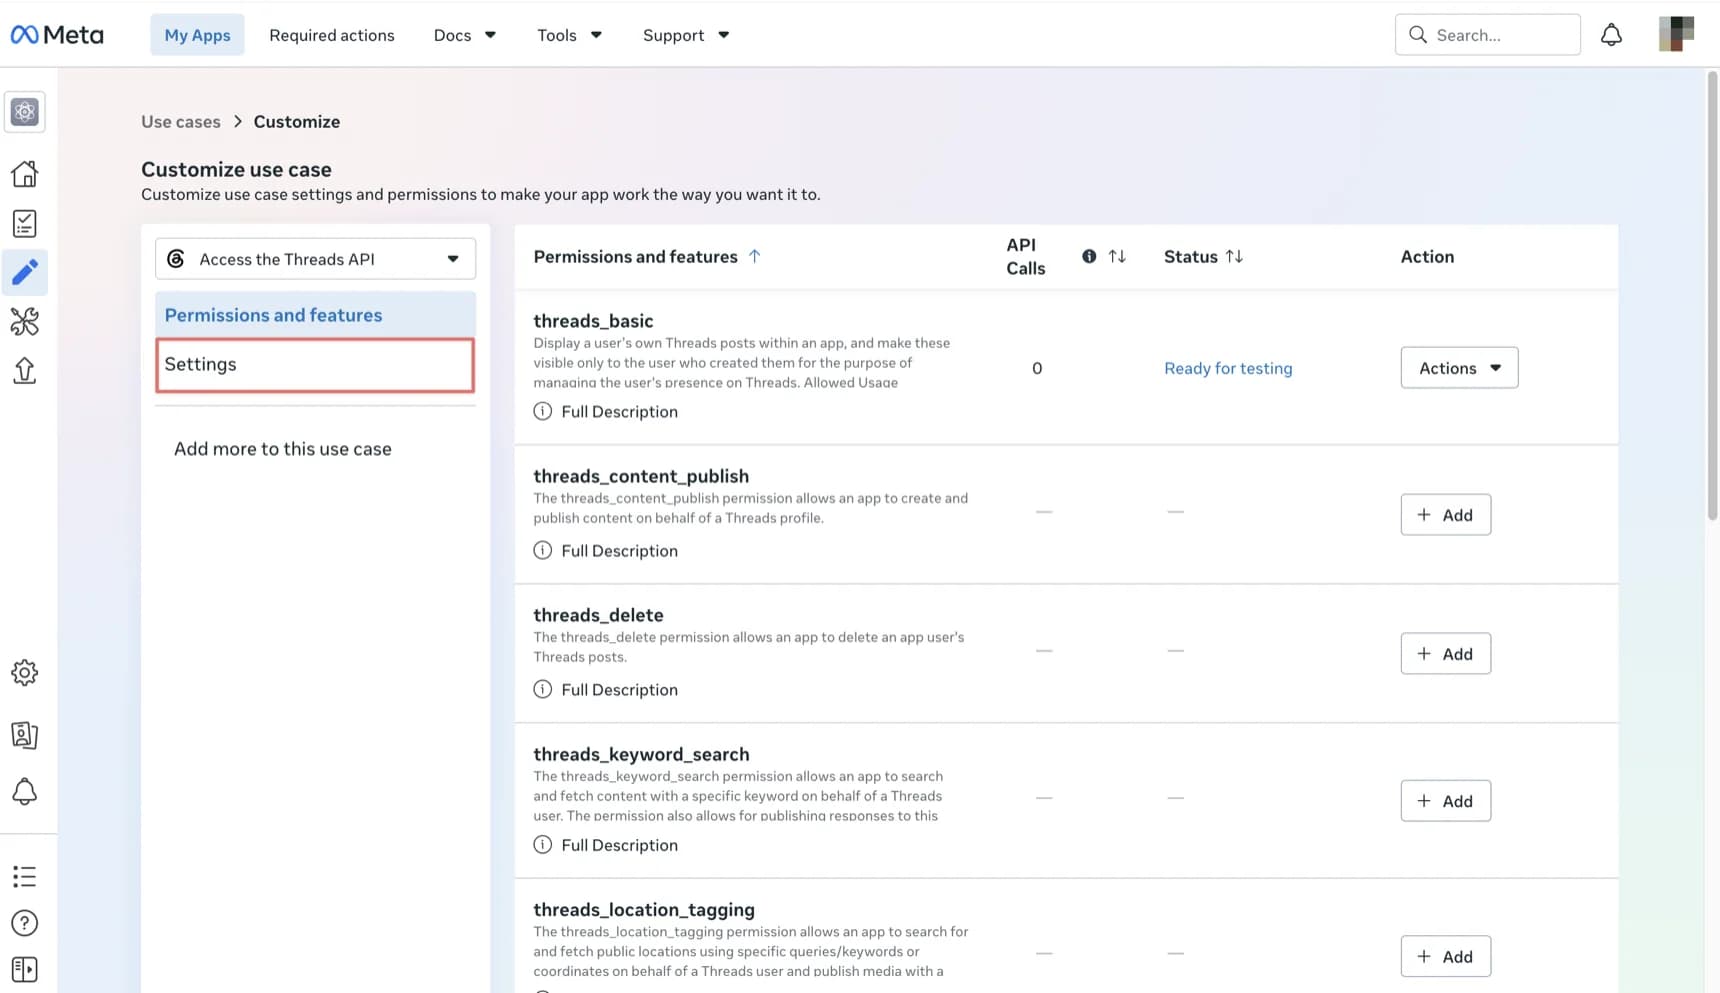
Inside Customize use case, the left panel shows Permissions and features and Settings. Click Settings.
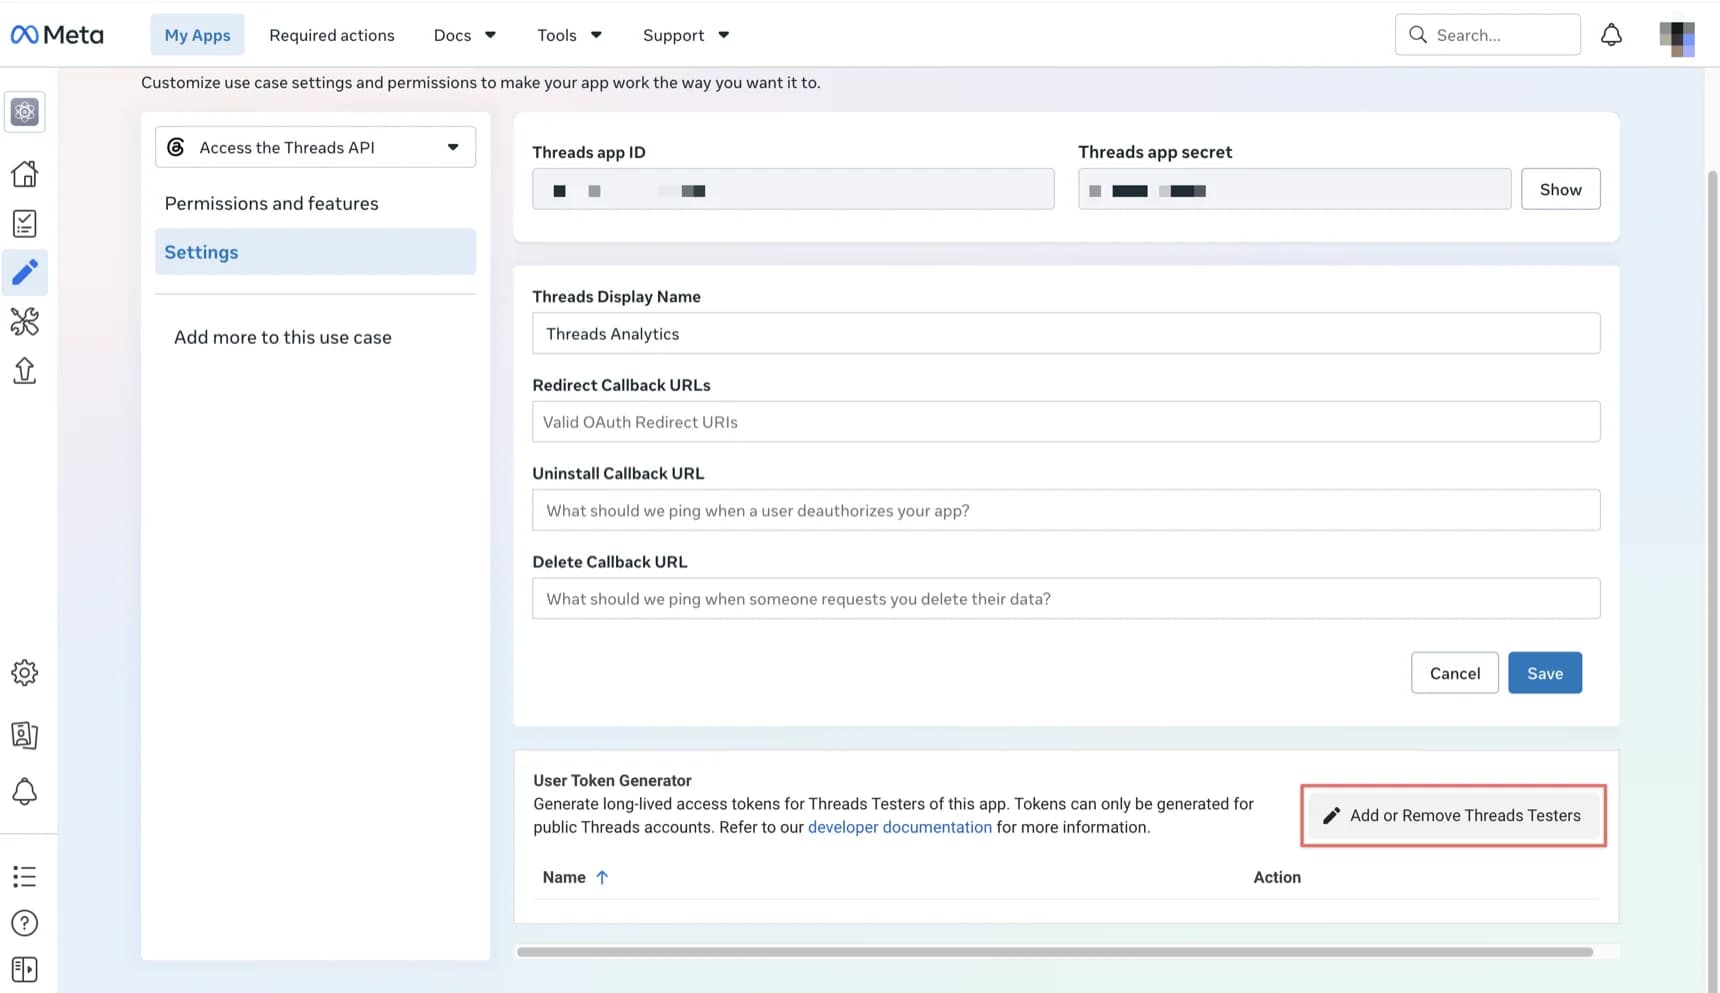
At the bottom of the Settings page, find User Token Generator and click Add or Remove Threads Testers. The same page also lists:
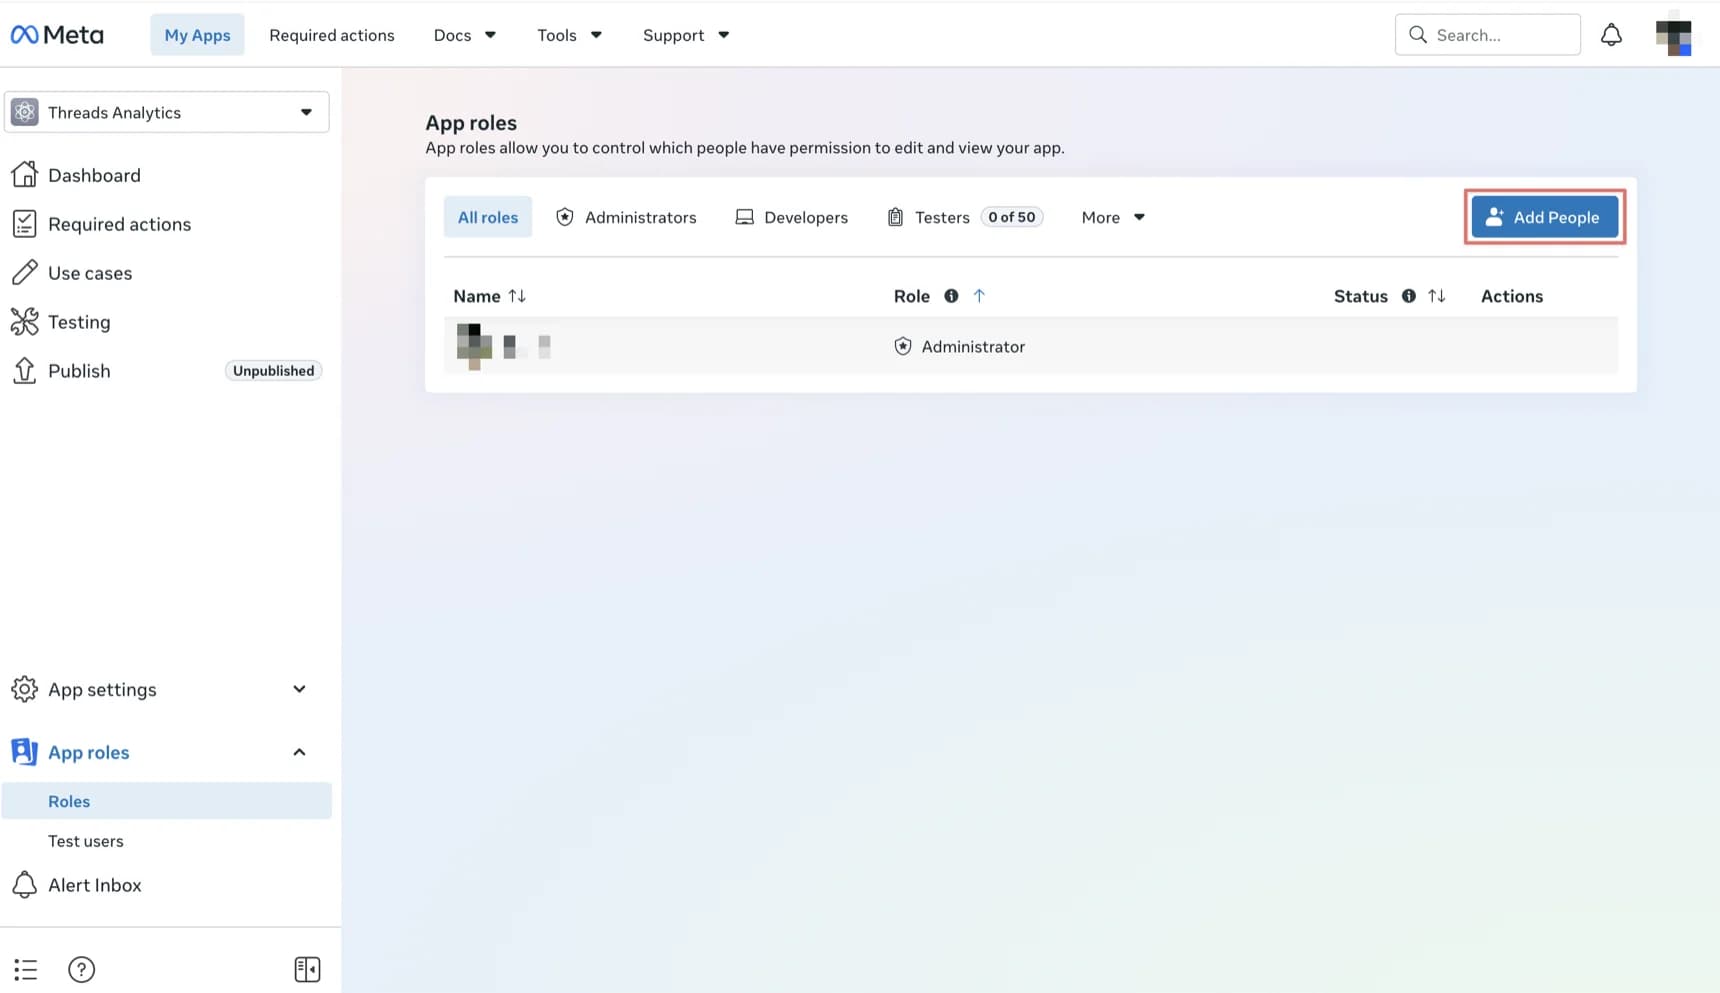
You land on the App roles page. Click Add People in the top-right corner.
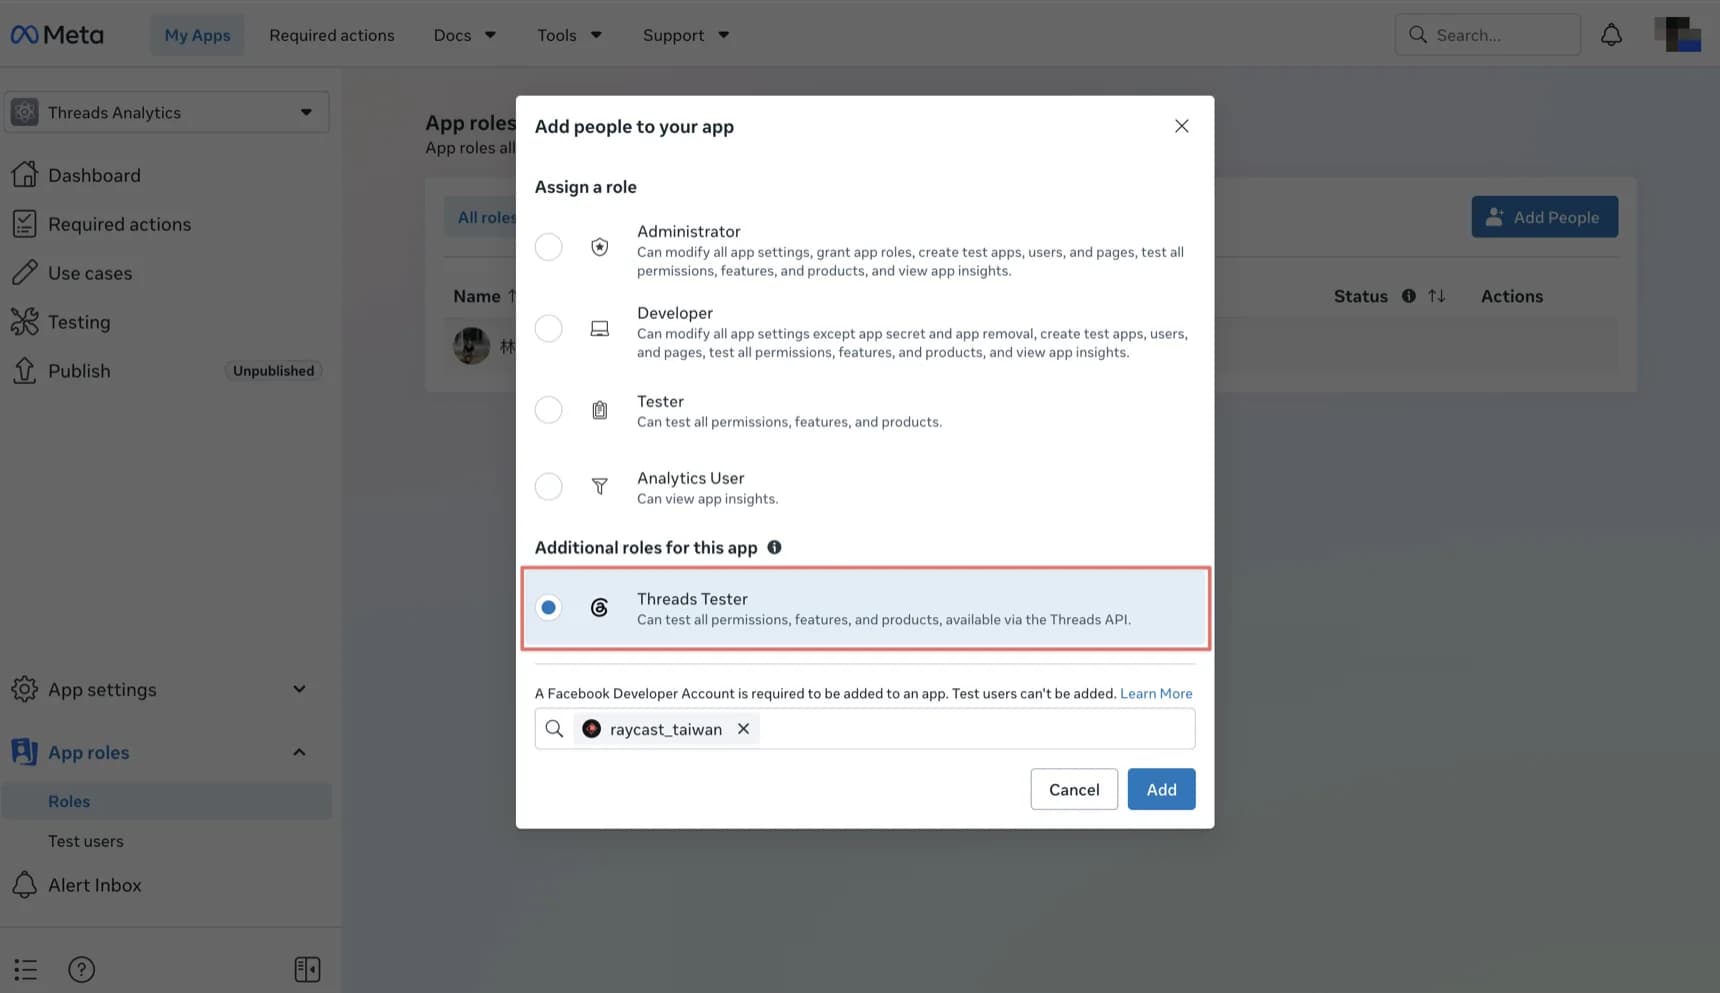
In the Add people to your app dialog:
The invited account must be a public Threads account and has to accept the invitation from Threads. If it doesn't appear in search, confirm the user has a Meta developer account and a public Threads profile.
03 / STEPS 13–14
Switch to the invited Threads account for two clicks — the invitation is waiting under website permissions.
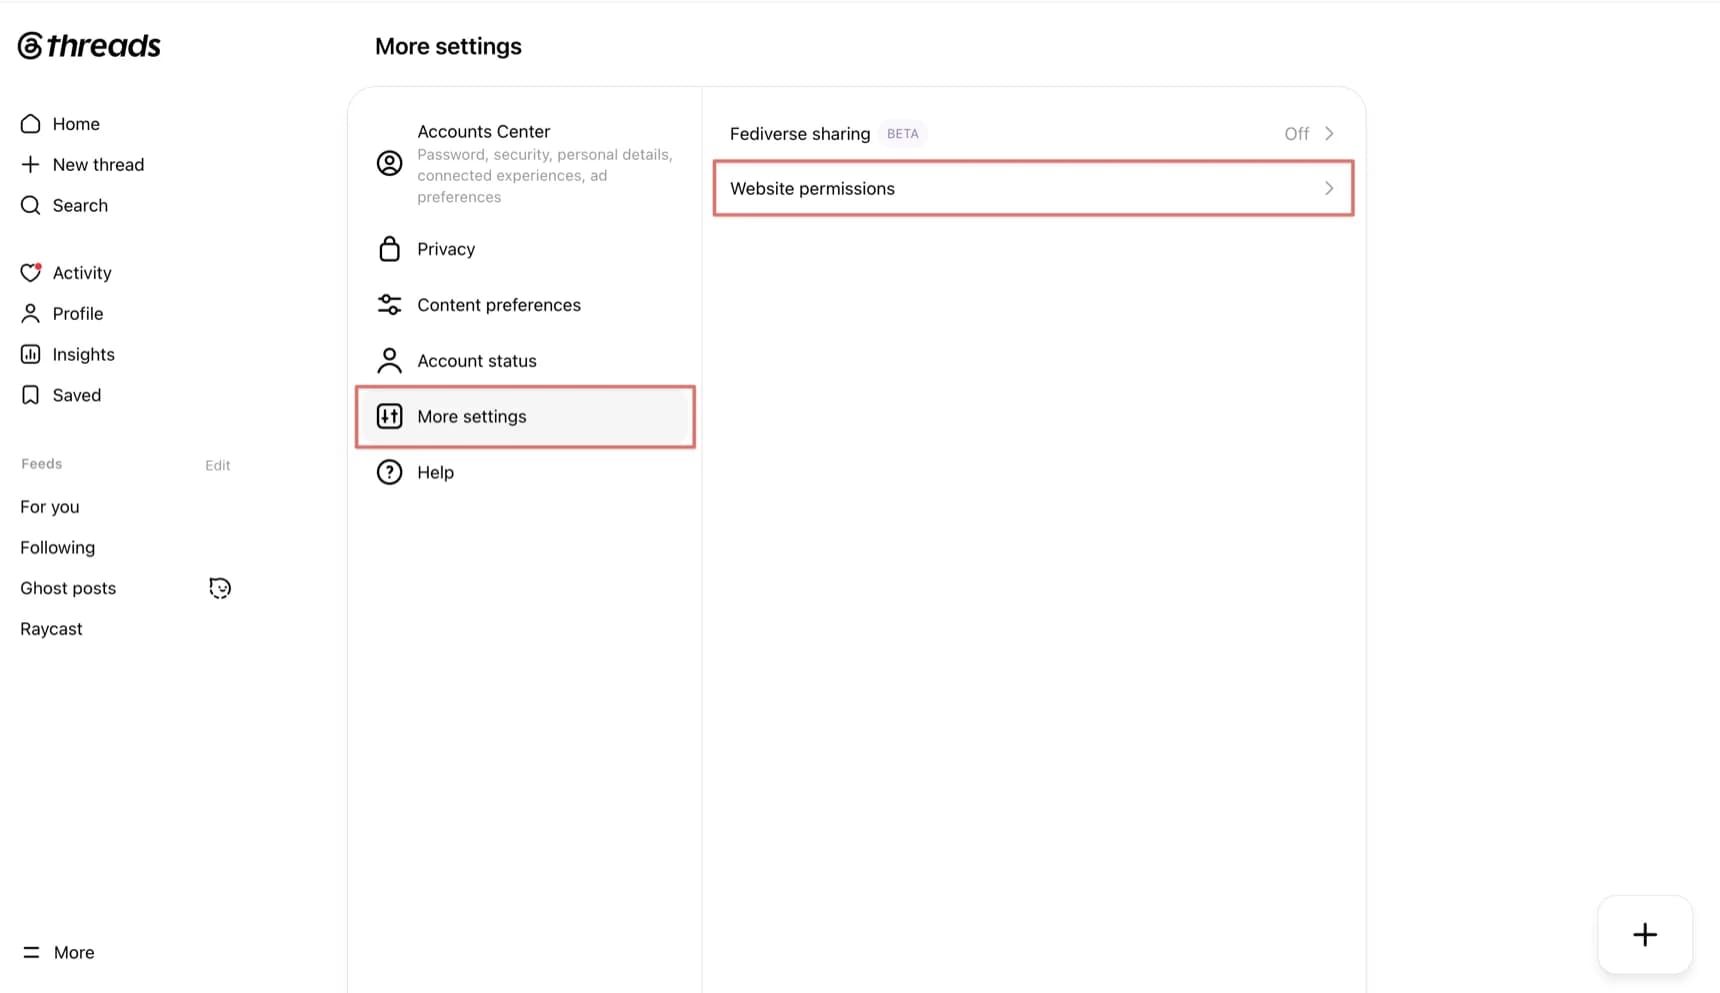
With the invited Threads account, open Threads on the web. Go to More settings, then click Website permissions.
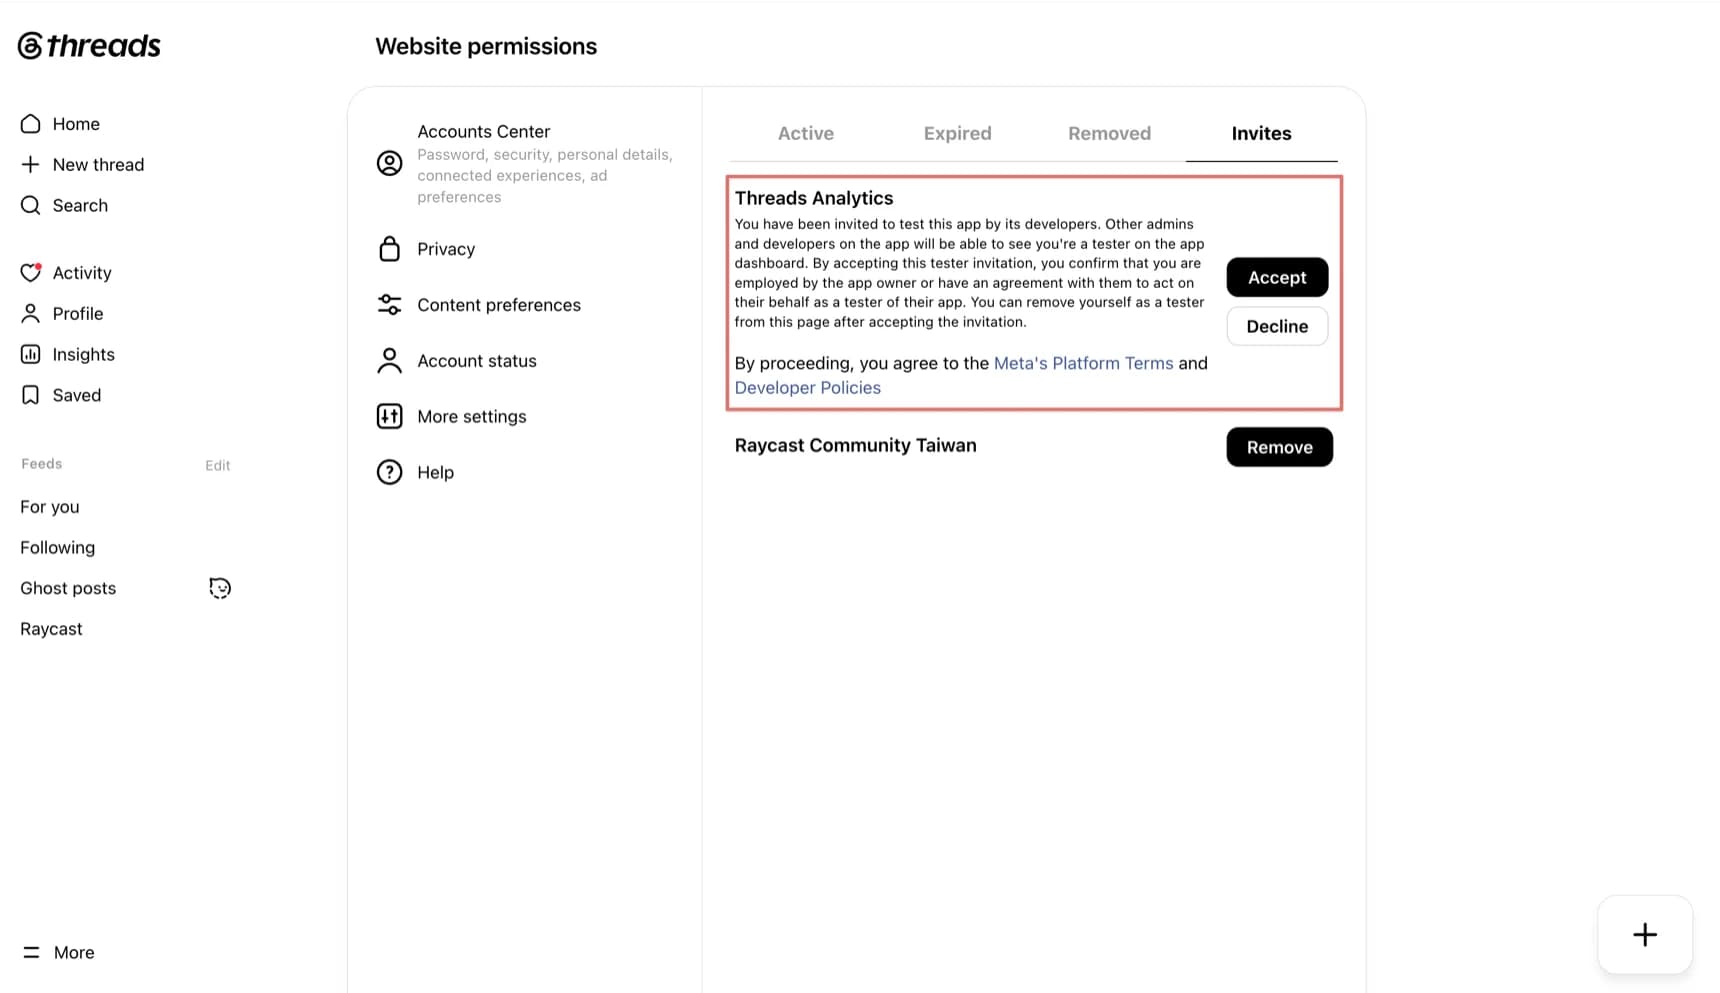
In the Invites tab, find the app you created — for example Threads Analytics — and click Accept.
04 / STEPS 15–18
Back in Meta Developers: generate, authorize, copy. The long-lived token is yours.
Back in Meta Developers, go to Use cases → Access the Threads API → Customize, then click Settings in the left panel.
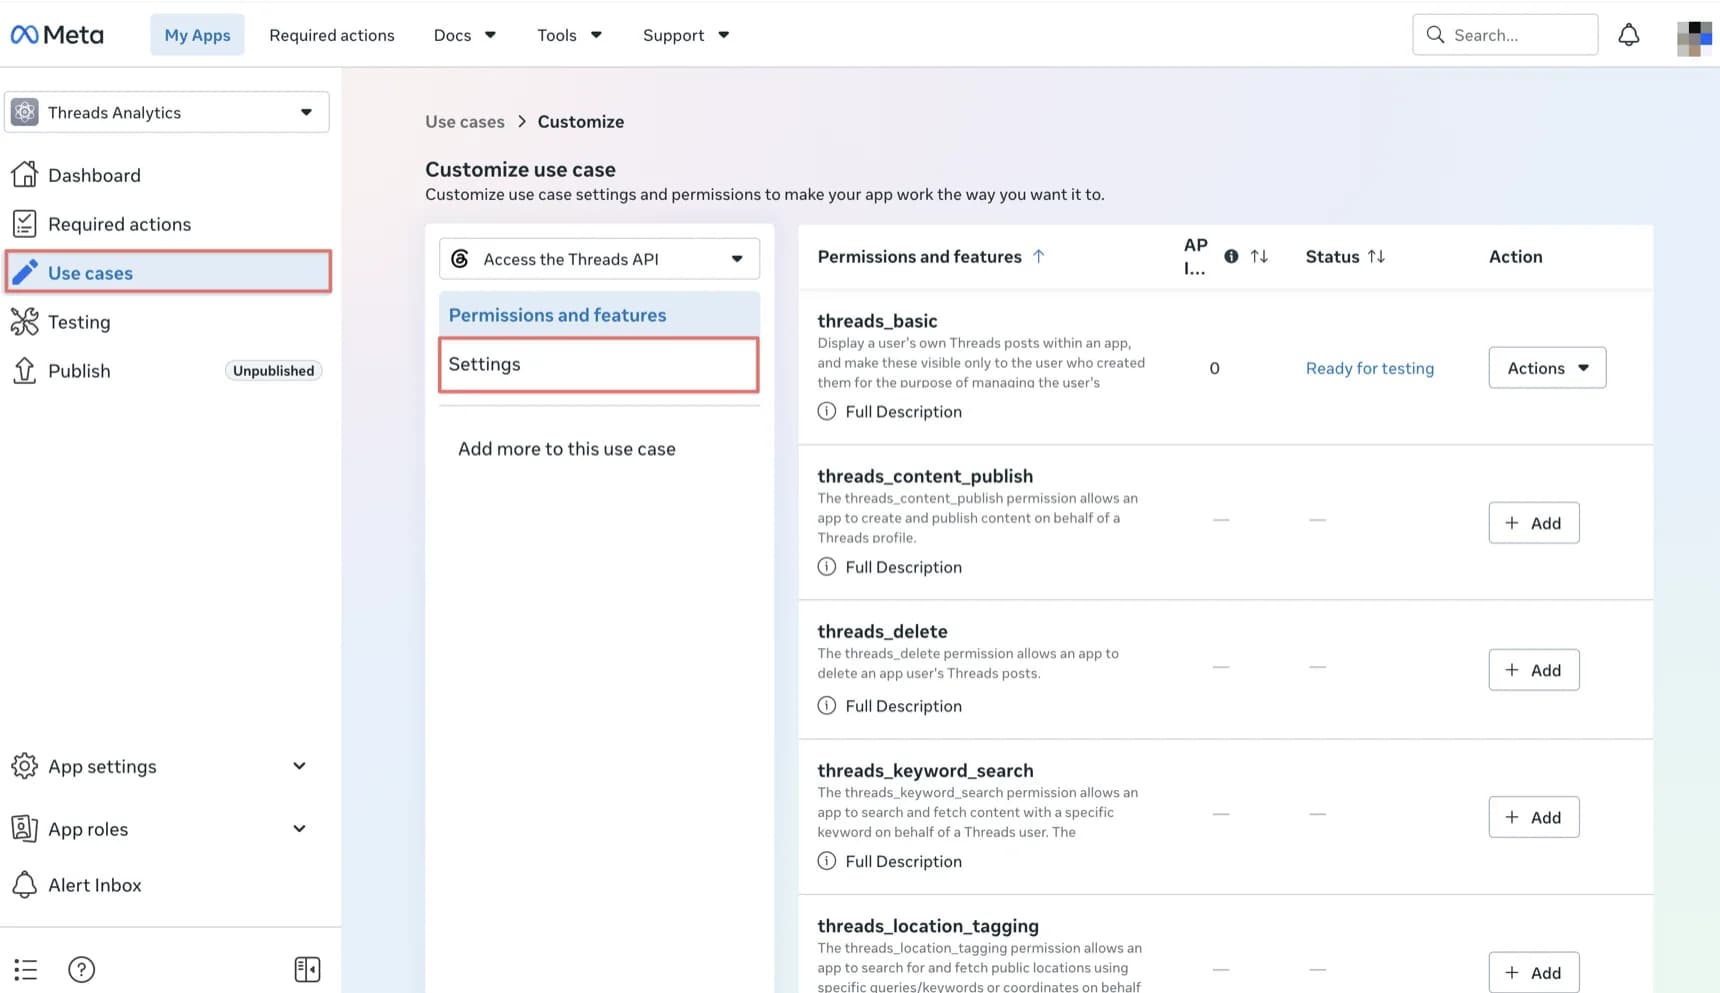
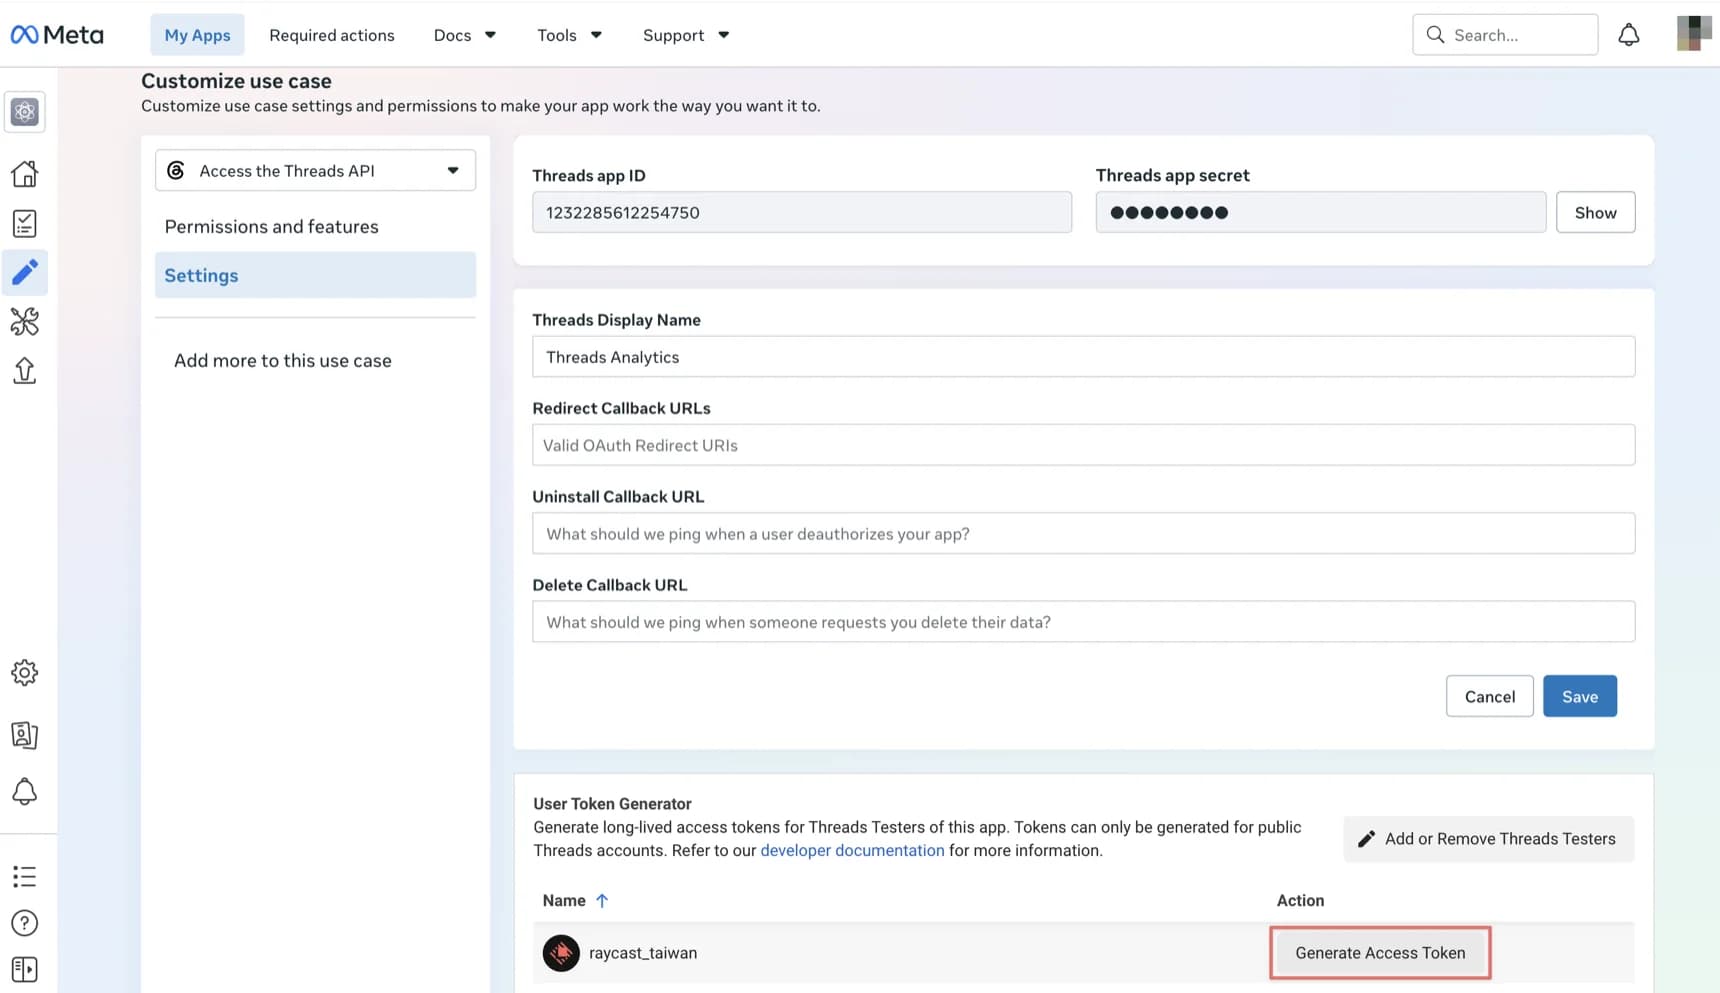
In User Token Generator, find the Threads Tester that accepted the invitation and click Generate Access Token on the right.
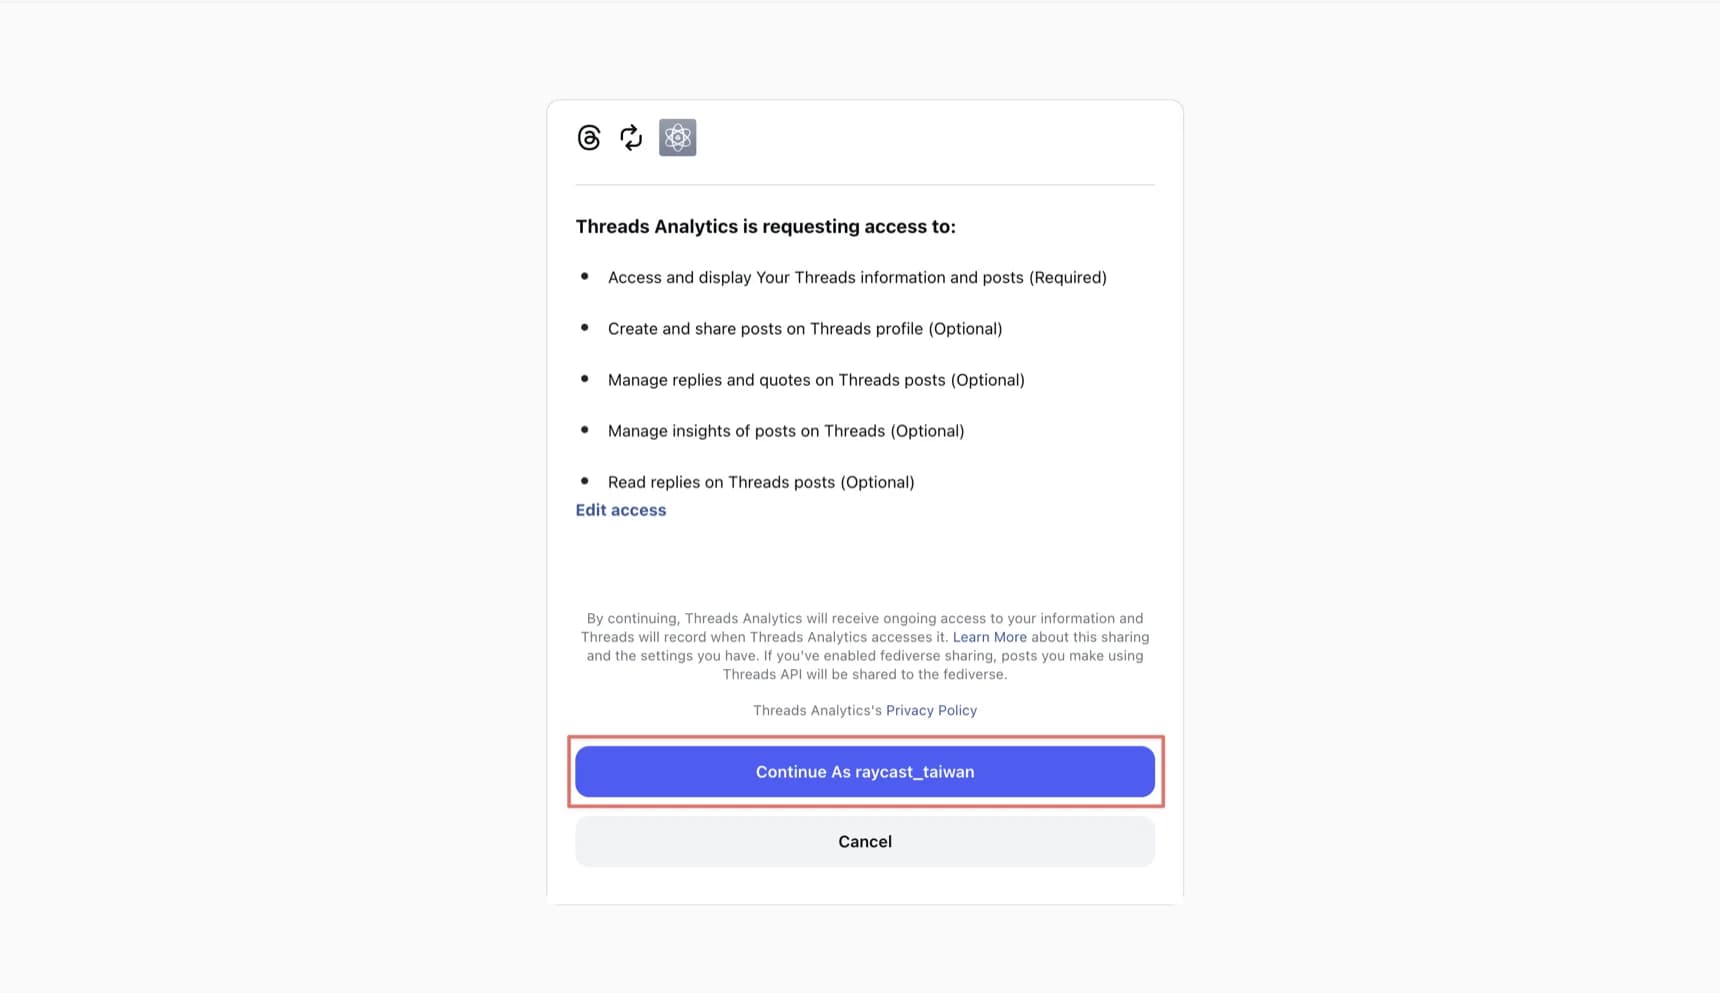
The authorization page lists the Threads permissions the app will receive. Confirm the account is correct, then click Continue As ….
If you open Edit access, keep the data and insights permissions enabled — without them the token can't sync analytics data.
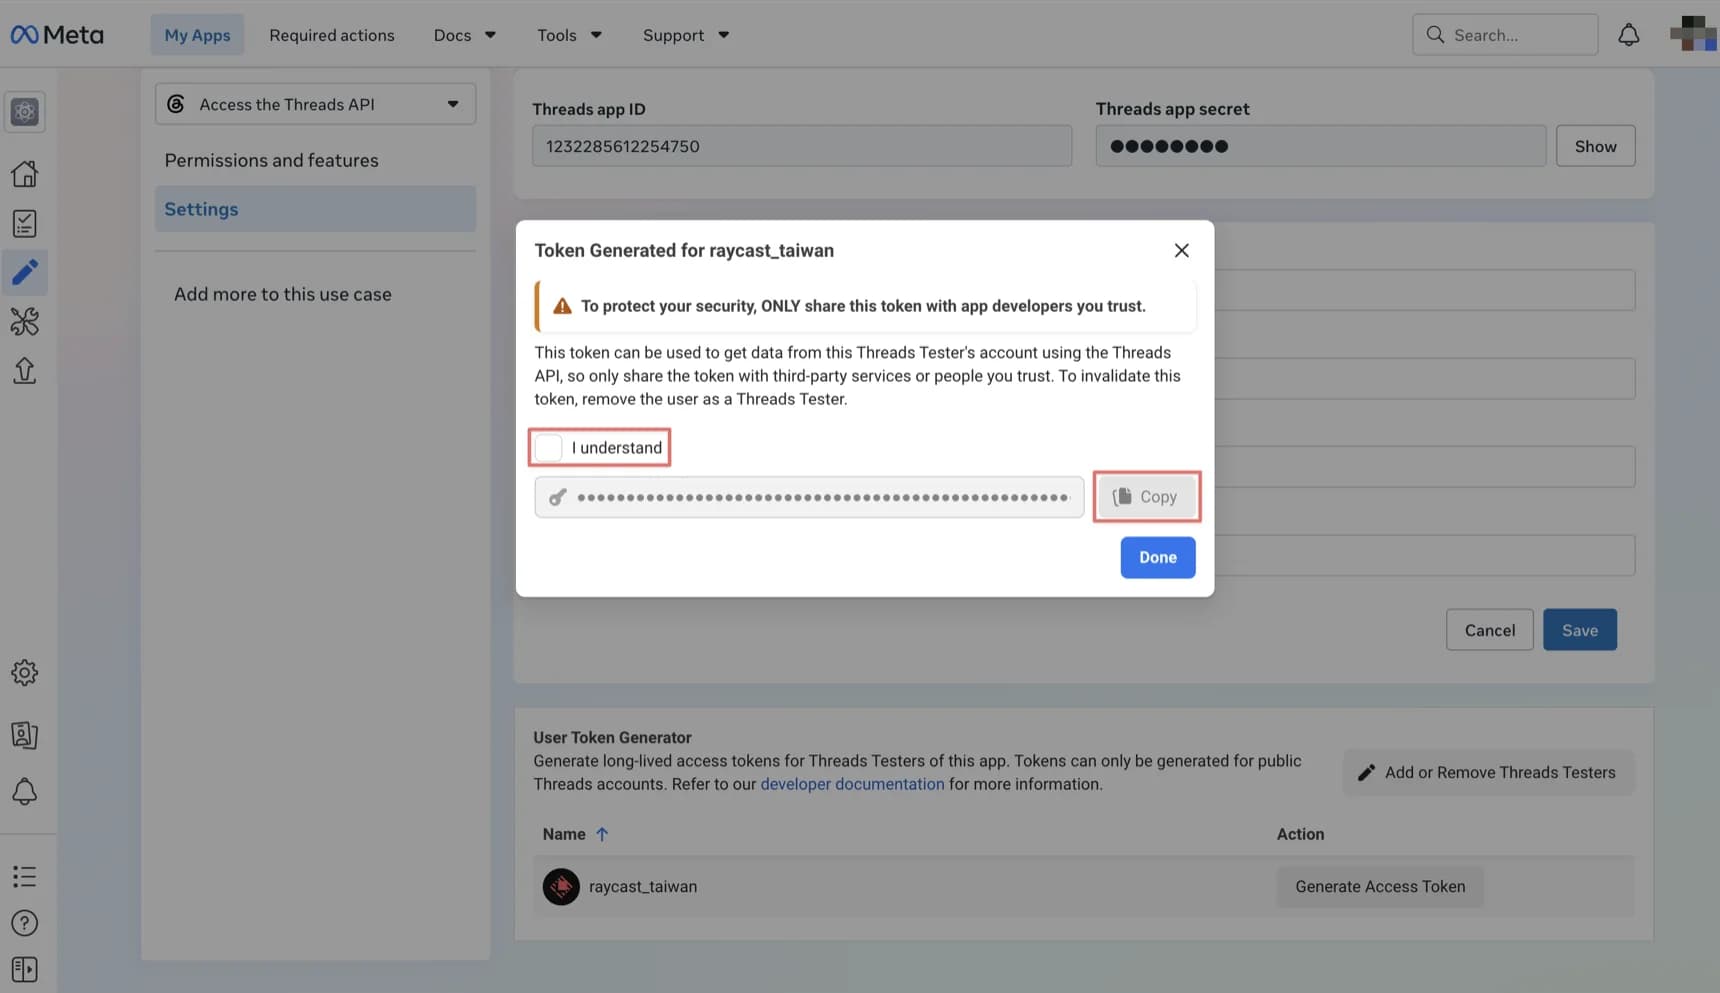
Back in Meta Developers, the token dialog appears. Select I understand, then click Copy to copy your long-lived Threads access token.
AFTER THE TOKEN
Paste it into your dashboard under Settings → Add Threads account and run the first sync.
Tokens last 60 days, and the dashboard renews them automatically during sync — you won't need this guide again. If a token still expires because the app was offline too long, generate a fresh one here and paste it with **Update token** on the account card; your synced data is kept.